Sigma SSP Surround Sound Preamp/Processor
Information
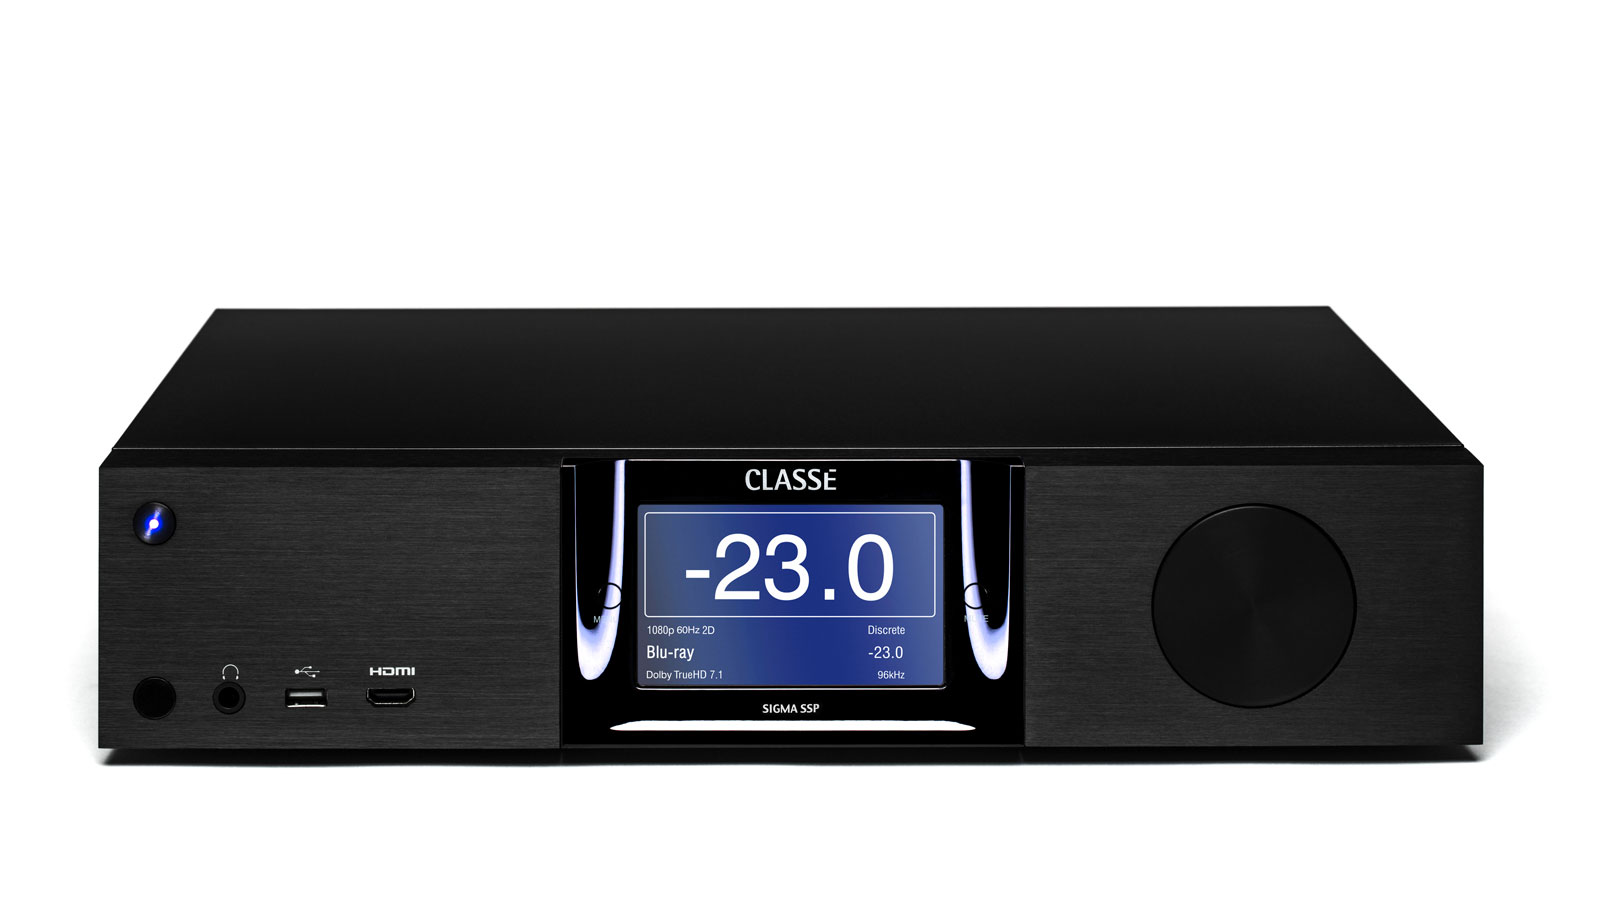
The Sigma SSP is a 7.1 channel preamp/processor optimized for stereo but including HDMI switching, multichannel processing and bass management. Its wide variety of input connectors includes asynchronous USB and Ethernet for streaming, augmented by coax and optical; balanced and single-ended analog inputs plus an optional phono stage show how versatile this preamp/processor is despite its compact size. A host of performance-oriented features including digital domain tone/tilt control, and nine-band per channel parametric EQ ensure the best performance with each recording in every room.
Product Info Sheet
Sigma SSP - Product Info Sheet - English
Specifications
|
USB audio |
up to 24-bit/192 kHz | |
|
USB (Host) |
charging capability 2 Amps |
|
|
AirPlay supported |
AAC (8 to 320 kbps) Protected AAC (from iTunes Store), HE-AAC, MP3 (8 to 320 kbps), MP3 VBR, Audible (formats 2, 3, 4) Audible Enhanced Audio (AAX, and AAX+), Apple Lossless, AIFF, and WAV |
|
|
DLNA supported |
Apple Lossless (ALAC), mp3, FLAC, WAV, Ogg Vorbis, WMA, AAC |
|
|
Frequency response |
8 Hz - 200 kHz < 1 dB, stereo digital bypass 8 Hz - 20 kHz < 0.5 dB, all other sources |
|
|
Channel Matching |
better than 0.05 dB | |
|
Distortion (THD+noise) |
0.0005%, digital source/bypassed analog source .002%, processed analog source |
|
|
Maximum input level |
2 Vrms (DSP), 4.5Vrms (bypass) | |
|
Maximum input level |
4 Vrms (DSP), 9 Vrms (bypass) | |
|
Maximum output level |
9 Vrms | |
|
Maximum output level |
18 Vrms | |
|
Gain Range |
-93 dB to +14 dB | |
|
Input impedance |
100 kΩ (single-ended) | |
|
Input impedance |
50 kΩ (Balanced) | |
|
Output impedance |
100 Ω | |
|
Output impedance |
300 Ω | |
|
Signal-to-noise ratio |
104 dB, bypassed analog source 101 dB, processed analog source (re. full-scale input, unweighted) 105 dB, digital source |
|
|
Channel separation |
better than 100 dB | |
|
Channel matching |
>0.05 dB |
|
|
Crosstalk |
better than -130 dB @ 1 kHz |
|
|
Rated power consumption |
35 W |
|
|
Mains voltage |
100-240 V, 50/60 Hz |
|
|
Overall dimensions |
17.0" (433mm) |
|
|
Net weight |
18 lb (8.21 kg) |
|
|
Shipping weight |
25 lb (11.34 kg) | |
|
Made for Made for Made for Airplay
|
||
Firmware
Latest Firmware : Version 1.0.3.16
(part of a Unified Firmware Package with SSP MkII)
As of July 2017, Sigma SSP Firmware is bundled as a “Unified Package”. This Unified Package automatically detects the Sigma SSP model and installs the appropriate Firmware.
Firmware Archive - previous versions
- Version 1.0.3.11 (Date: 2 June 2017)
- Version 1.0.3.0 (Date: 4 July 2016) - download
How to check the current Firmware of your Sigma SSP
- Press the MENU button on the left of the touchscreen
- Press STATUS
How to update Sigma SSP Firmware
- download the latest Firmware package
- unzip the downloaded file on your local computer
- copy the unzipped file onto a new USB key. This key must be empty. The file must be located at the "root" level
- power off your Sigma SSP using the Power switch on the rear of the unit
- insert the USB stick in the front USB port
- Power on the Sigma SSP using the power switch in the rear of the unit
- the Firmware update will start automatically and will take xx minutes
- At the end of the Firmware update the unit will ask you calibrate the touchscreen by tipping multiple calibration targets with a tipped object (lead pencil, fingernail, stylus)
What to do when your Firmware Update fails
- simply power down the unit and remove the USB key, the unit should revert back to its previous Firmware Version when your power on again
- insert the USB key into your local computer and open the USB key (file explorer)
- you will notice that 2 LOG files have been written to the USB key. Copy these log file to your local computer. You can send them to Classé Tech Support for further evaluation
- In most cases the software update fails because of an issue with the USB key (previous vendor formatting, file allocation issues). We recommend to buy a clean new USB key and repeat teh Firmware download and update procedure.
Initial Installation
For the initial installation we refer you to pages 9, 10 and 11 of the Owner's Manual.
Extra considerations, based on Customer Service reports:
1. When first powering up the unit, check if the Firmware is Up-to-Date.
Press the Menu button the left of the Touchscreen, then press the STATUS button to check the current FW Version installed. On this Web Page, click on the "Latest Firmware" Tab to see if your unit has the latest FW. If not download the firmware and follow the instructions.
2. Please do send in your Warranty Registration!
Sending in your Warranty Registration via our public website is the best way to ensure that we can reach you for product-related updates.
3. Start by programming your Speaker Configurations, then the Inputs.
Pages 22 to 24 of the Owner's Manual will give you the correct sequence of connecting all equipment.
Many customers, however, stop there and do not take FULL advantage of the unit's powerful sound processing capabilities. By accurately programming your Speaker Configuration(s) your SSP will "know" how to correctly decode and process the incoming signal. In fact, you can create multiple Speaker Configurations and use them according to your Input sources: 5.1.2, 5.1 and Full Range Stereo are amongst the most important configurations. See the Section below.
Once you have programmed your Speaker Configuration(s) you can set up your Inputs which will then allow you to "link" the Speaker Configurations to the Inputs and choose the default Processing Modes you would like to use.
Both the default Configuration as well as default Mode you programmed for a given Input can be overridden in Real Time, if you wish to do so.
Speaker Configuration
text
Input Configuration
text
Connection to Router
The Sigma SSP has an Ethernet port, capable of receiving incoming High Resolution Audio as well as communicating RS232 Automation Data. Please follow the directives below for optimal use:
- Use good quality CAT5 or CAT6 Ethernet cable;
- Preferably, connect the Sigma SSP MkII directly to your Network Router;
- Make sure the Router Ports mentioned below are open and accessible to the SSP MkII*);
*) Routers provided by Cable Companies or Internet Service Providers will auto-update from time to time, most often whilst you are asleep. If the Sigma SSP starts acting up, then the first thing to do is to see if the Router hasn't simply closed ports during the Auto-Update. The second measure is to reboot (power on/ power off) both the router as well as the Sigma SSP.
Required Router Ports
NOTE: CLASSÉ provided earlier information to "open" certain Router Ports. This information has proven to be incorrect.
Instead, the CLASSÉ App and Router Problem that some customers experience can be explained by a lack of "UDP Multicast" support on certain routers.
"UDP Multicast" is the protocol that the CLASSÉ App uses to communicate its data. We have noticed that certain Internet providers and Router manufacturers either:
- do not "switch on" this protocol by default (it must be activated)
- have stopped supporting it over the last decade.
Customers who experience CLASSÉ App functionality problems must check their routers for Multicast UDP functionality and support. If possible, it must be activated. If Multicast UDP is not supported, the customer should check if another Router can be obtained, or see if a separate wireless router can be installed, one that does support Multicast UDP.
As far as the "Open Ports" is concerned: the list of Ports below is indeed correct. However, customers should NOT open these ports to the World Wide Web (Internet), but make sure these ports are accessible on the internal network (only). Opening these ports to the outside world can pose an elevated security risk.
------
Make sure that the following ports are open on the Router. Without these ports, the unit will not perform its tasks.
Apple AirPlay/Bonjour (Music playback)
- Port 554 TCP/UDP [Real Time Streaming Protocol]
- Port 3689 TCP [Digital Audio Access Protocol]
- Port 5353 UDP [Multicast DNS]
DLNA/UPnP (Music playback)
- Port 1900 UDP
- Port 5000 TCP
Classé App
- Port 35295 UDP
- Port 35296 UDP [Multicast]
TCP Control (RS232 Automation over IP, for Home Automation Systems like Crestron, SAVANT or Control 4)
- Port 50001 TCP
Naming your unit
See Page 44 of the Owner's Manual.
We strongly suggest you give your unit a "Name" that will allow you to find it easily on your Home Network. In order to do this, you will need to read out the assigned IP-Address on the touchscreen, the type this IP address into a Web Browser on a computer (laptop, desktop) connected to the same network. A Sigma SSP Web Page will appear, allowing you to change the name of the unit.
Static IP Address or assigned IP Address?
1. We suggest Owners who use the unit in a stand-alone setting, primarily for Network Audio Playback, to use the default setting (DHCP-assigned IP Address): The unit will get an IP Address assigned by the Home Router
2. For those Owners who use the Sigma SSP through Home Automation (e.g. Crestron, Control4, Savant), a fixed IP Address may be necessary. See the instructions in the Owner's Manual. Once you have assigned a fixed IP Address, you will need to make sure that your Router respects this address. Depending on your Router, you may need to:
- make sure that the fixed IP Address falls outside of the range of "Reserved IP Addresses" that DHCP will use;
- make sure that the SSP's MAC Address is registered in the Router. Since a SSP will not display its MAC Address on touchscreen, we suggest that you use an App like "Fing" to look up the SSP's MAC Address.
Home Automation
The Sigma SSP can be controlled via Infrared Remote Control and via RS232. The latter is available via a DB-9 connector and using the Ethernet Connector (RS232-over-IP).
IR Remote Control Codes
- Sigma SSP Surround Processor - IR Codes.pdf | HEX Codes.pdf
RS232 Protocol
Automation Drivers
Export and Import User Settings
Using a USB Key, you can export and import User Settings. This is useful in case:
- you want to do a Factory reset (prior to executing the reset);
- you want to back up your settings for archiving (useful for AV installers!);
- you want to copy User Settings from this Sigma unit to a different Sigma unit.
Export User Settings to USB Key
- Insert an empty USB Key into the USB slot in the Front of the unit
- A Dialogue Window will appear asking you if you want to update Firmware, or if you want to Import/Export User Settings.
- Click the button that states "Goto Import/Export"
- Select Export Settings
- Wait for the dialogue window that confirms "done"
- Wait for the unit to go into Standby
- Remove the USB key
Import User Settings from USB Key
The Import User Settings from can be used in one of two ways:
- To restore User Settings after Factory Reset;
- To import User Settings from a different unit, aka to "copy" settings from one unit to another unit
1. Restore User Settings after Factory Reset
- Insert the USB Key that has the User Settings on it
- Select the button "Goto Import/Export" on the touchscreen
- Select "Import Settings"
- On the Settings Import page, make sure the first checkbox "S/N" is selected, ignore the other checkbox and the keypad
- Click "Import Settings"
- Wait for the dialogue window that confirms "done"
- Wait for the unit to go into Standby
- Remove the USB key
2. Import User Settings from a different unit (copy User Settings)
- Insert the USB Key that has the User Settings on it
- IMPORTANT: Make sure you have written down the Serial Number of the unit from which you exported the User Settings originally.
- Select the button "Goto Import/Export" on the touchscreen
- Select "Import Settings"
- On the Settings Import page, make sure to uncheck the first checkbox "S/N"
- Using the Keypad on screen, type in the 4 missing digits of the Serial Number of the unit where the user Settings originated from
- Click "Import Settings"
- Wait for the dialogue window that confirms "done"
- Wait for the unit to go into Standby
- Remove the USB key
Factory Reset
A Factory Reset (called "Restore Defaults") erases all User Settings and resets the unit's parameters to Factory Default.
A Factory Reset is useful when you want to program your unit from scratch, when you sell your unit to another customer or when your unit has unexpected behavior that may be related to conflicting settings.
Reset Procedure
NOTE: The Reset Procedure will erase all your User Settings and cannot be undone. However, you can export your User Settings to a USB Key prior to Factory Reset. See the Tab "Export User Settings" for more information.
Procedure:
- On the unit, press the MENU button located at the left of the touchscreen
- Using the small black Classé Remote Control, press -- in sequence ---the buttons F1, F2, F3
- You will now see the menu called "Other Options" (which we also call "Tech Menu")
- Press the button "Restore Defaults"
- That's it. The unit will reset itself and go into Standby
Voltage
The Sigma SSP and Sigma SSP MKII can operate on AC Voltages between 110V - 240V. The Sticker in the back of the unit indicates which Voltage your unit has been set for. In fact, there are no "internal settings", but the Fuse Value MUST match the Voltage used in your country/region.
What to do when you change countries/voltages:
- Make sure to change the AC Fuse (located in the rear) to match the AC Voltage of your country.
- Contact a Classé Service Center to obtain a new sticker (Free of Charge) for the back of your unit that indicates your unit's Serial Number and the new new Operating Voltage.
Fuse
- The Sigma SSP and the SSP MkII has one fuse accessible via the rear panel;
- Make sure that the AC Fuse Value corresponds to the AC Voltage in your region;
Fuse Specifications
-
For 100-120 Volts
Fuse Value: T6.3AH 250V
Description: IEC time lag, high breaking capacity, 6.3A 250V
Classé Part No. 51764877-00 0
Schurter Part No. 0001.2512
Littlefuse Part No. 21506.3
- For 220-230-240 Volts
Fuse Value: T3.15AH 250V
Description: IEC time lag, high breaking capacity, 3.15A 250V)
Classé Part No. 51764794-00
Schurter Part No. 0001.2509
Littlefuse Part No. 2153.15
Image Gallery
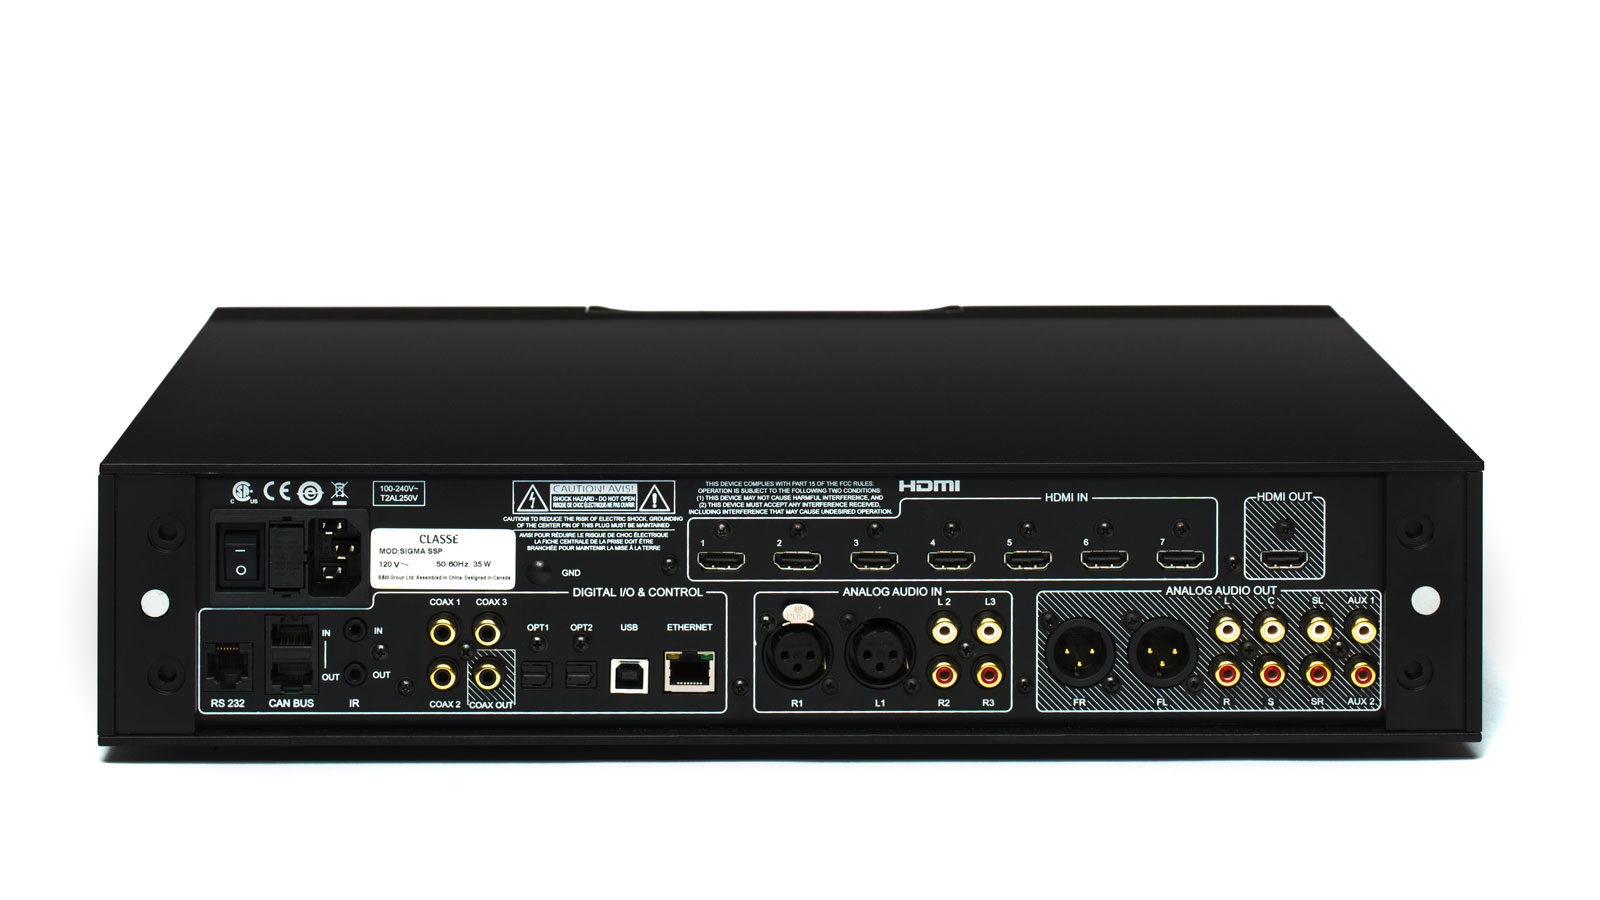
Drawings 2D/3D
- Sigma SSP - 2D Drawing.pdf
- Sigma SSP - Back Panel Drawing.pdf
Warranty
Your Classé Sigma unit has a 5-year Limited Product Warranty on Manufacturing Defects that covers both Material and Labor.
- Please note that the Classé Limited Warranty is only valid in the Country of Purchase.
- Please make sure to keep your original Purchase Receipt.
- The 5-year Limited Warranty is transferable to a next owner. When selling your unit, please hand the original purchase receipt to the next owner.
In case you reside in a Country that does not have a national Classé or Bowers and Wilkins Distributor, please contact one of our three global Service Centers (Hong Kong, United Kingdom or USA) to discuss Warranty Service.
Warranty Date Dispute
If you do not have your original purchase receipt anymore, Classé will use the Factory Shipping Date as the Purchase Date to determine Warranty Status.
Repair
In the unfortunate event that the unit develops a problem we advise you to follow the procedure below
- Make sure the unit has the latest Firmware. Does it solve the issue?
- Try and find your answer on this website
- You can submit a question on-line, call your local Classé Dealer or contact a Classé Service Center directly
- Should the defect require repair, a Classé Service Center will send you a Return Authorization which you can use to ship your unit
- Please do not ship a unit to a Classé Service Center WITHOUT Return Authorization